
Crafting with Cutters Challenge #130 BOOKS

Hello everyone! Today is another fun challenge over at CRAFTING WITH CUTTERS and it is all about books or libraries as this is National Library Week.  If any of you have followed me for any length of time, you know that I love mini books so I thought a mini book would be a perfect way to keep with this week's theme! I chose to make a simple paper bag mini book:


Here are a few pics of the assembly process:
Adhere folded small ends together.


Attach all sections together.

Cover pages with patterned scrapbook paper.

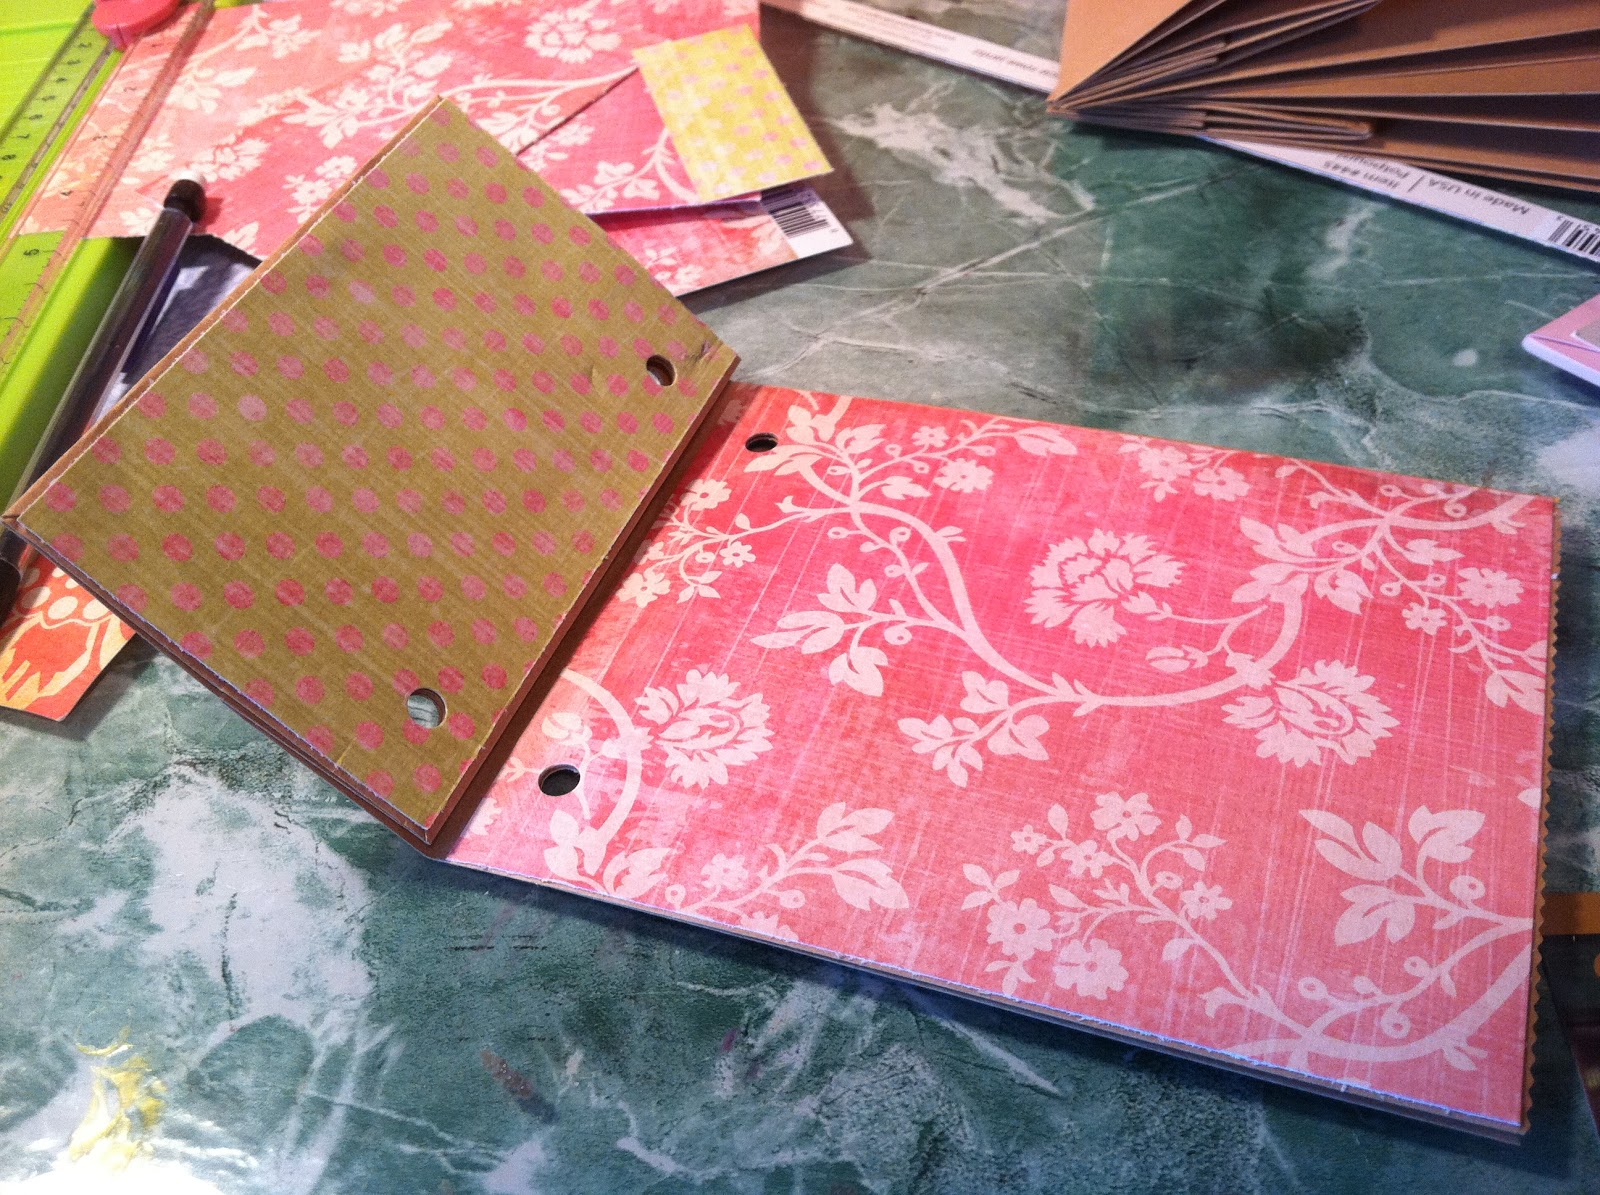
Punch holes through all layers.

Thread ribbon through the holes and.....

Tie in front.

I used TBBM to cut some various shaped tags to use in the pockets of the album.

A couple of views from the side.


Paper bag mini books are so much fun to make and it is so easy to be creative with them! 

Thanks for stopping by today and be sure to head over to CRAFTING WITH CUTTERS to see more projects that fit this week's theme and to play along with us!


Comments

Brenda said…
what a perfect way to celebrate books than by making a mini book Jen! I love paper bag minis, they are just so cool with the pockets and all! Your looks fabulous and I loved the mini tutorial!
Sandy Palmer said…
Jen, this looks wonderful! Perfect mini book, and very useful too! :)
Sheena said…
Wow, this is an awesome project! I love how you used the paper bags, maybe this would get me wanting to try making a mini :)

~Sheena
Lynn B. said…
This is so cute, I want to try one! Thanks for sharing all the tutorial pics.
What a great way to celebrate with this adorable little mini! TFS
Janet Baldwin said…
This is such a cute mini-book. Great way to re-purpose paper bags too!

Popular posts from this blog

Be My Valentine Blog Hop

Hello everyone and welcome to the "Be My Valentine" blog hop!! This is the first blog hop that I have had the opportunity to participate in and I've had so much fun!   If you arrived here from  Macy Bella Designs  then you're on the right track. If not or if you have missed a few blogs along the way, be sure to go to the beginning at  Creations With Kathryn  so you can see all of the great Valentine projects today!! There are even some blogs that have blog candy - (like ME!)  After you check out my project, your next stop will be  Crafty Baskets  . Now, on to my project!! I made a box to put a set of Valentine's cards in. I used a 12x12 piece of double-sided cardstock from K and Co. The cards are made with Kraft paper and are a 4x4 size. I used the Cricut Sentimentals cartridge for the postage stamp cut on the front of each card and used my Gypsy to cut them so I could unlink the H and W so it would be 3.75" square. The valentine cuts for the front of the ca

Think Spring Blog Hop

                                Welcome to the THINK SPRING BLOG HOP!!  You should have arrived here from the amazingly talented  Crafty Baskets  !  If you just happened upon my blog, be sure to go back to the beginning at  Creations With Kathryn  . She is our wonderful host for this hop!  On to my project: I decided to make a Spring mini album to showcase a few pictures that I took at the Zilker Botanical Gardens in Austin, TX.  What is more telling of Spring than flowers?!   I used the Card/Tag feature on the Paisley Cricut cartridge and used paper from the DCWV Spring cardstack. (I think this stack was from last year or maybe even the year before! :-) I'm just finally using it! )  The paper flowers throughout are from the 3 Birds Pretty Petals collection.  Read to the end of this post to find the link for the next blog to hop to and for my blog candy! This is a pic of an open page. Now for my blog candy!!  Just leave me a comment on this post with a way to contact you -

My Pink Stamper Challenge

My Pink Stamper has posted a challenge today to any and all who would like a shot at being on her design team! My project needed to use a favorite Cricut cartridge and the colors: pink, green and brown and another color of my choice. I used my Creative Memories Cheerful Seasons cartridge and my Imagine with the Mr. Frosty pattern cartridge and Snapshot Everyday cartridges. I am going to frame this project so I can always look at my sweet little, brand-new grandson!! The mat behind this adorable picture was printed and cut on my Imagine from the standard shapes on the Imagine and the Mr. Frosty cartridge. I really like this snowflake pattern! This is a close-up of the tree and layers from page 60 of my Creative Memories Cheerful Seasons Cricut cartridge and was cut at 3.5"H. I used Star Dust Stickles to make the "snow" on the tree look like it was glistening! Notice the "wood" paper for the tree trunk - this is a texture pattern on the Snapshot Everyday Imagine