
Cookie Sheet Mini album / Home Decor piece

Hello everyone!! It's my turn again to be a guest designer at She's a Sassy Lady !! I decided to use an actual cookie sheet to showcase these great pictures of our niece and my mother-in-law baking cookies! This project was a little challenging since I haven't been home to my craft room since June 30th! We are traveling with my husband where he works so I made this project in our hotel room using the limited amount of craft supplies that I brought with me! These Club Ruby kits are perfect to take with me because they contain so many wonderful elements!  I was able to use my Mom's Cricut when we made a quick trip to Ohio! Yay!! I had my cuts all designed on my Gypsy so that made it really easy!!  I also used Paper Layerz for some of the cuts! This paper is awesome!!  To check out this paper click HERE!
Here it is all done and folded up! Now I'll go into more detail as to how each element was created.

I started with a 10.5"x15.5" cookie sheet.

I just love this paper from the Club Ruby Designers June kit!  This perfect ribbon is from Hobby Lobby!
This is a sheet of Paper Layerz paper by Megan Elizabeth! This paper is just awesome! Check out the link HERE or above!  This pic is before cutting.

Here is my Gypsy screen showing exactly where my cuts will be.

This is that same sheet of paper after cutting. You can see how much room I have left on this sheet!

My Gypsy screen for the next cut.


After cutting.

Close-ups of the cuts.


I cut a slit in this fold-out for the ribbon to hold it closed.


All buttoned up!
The top fold-out unfolded once.

Unfolded twice.

Unfolded three times.
Close-up of these die-cuts. I just love them!
All the way open.
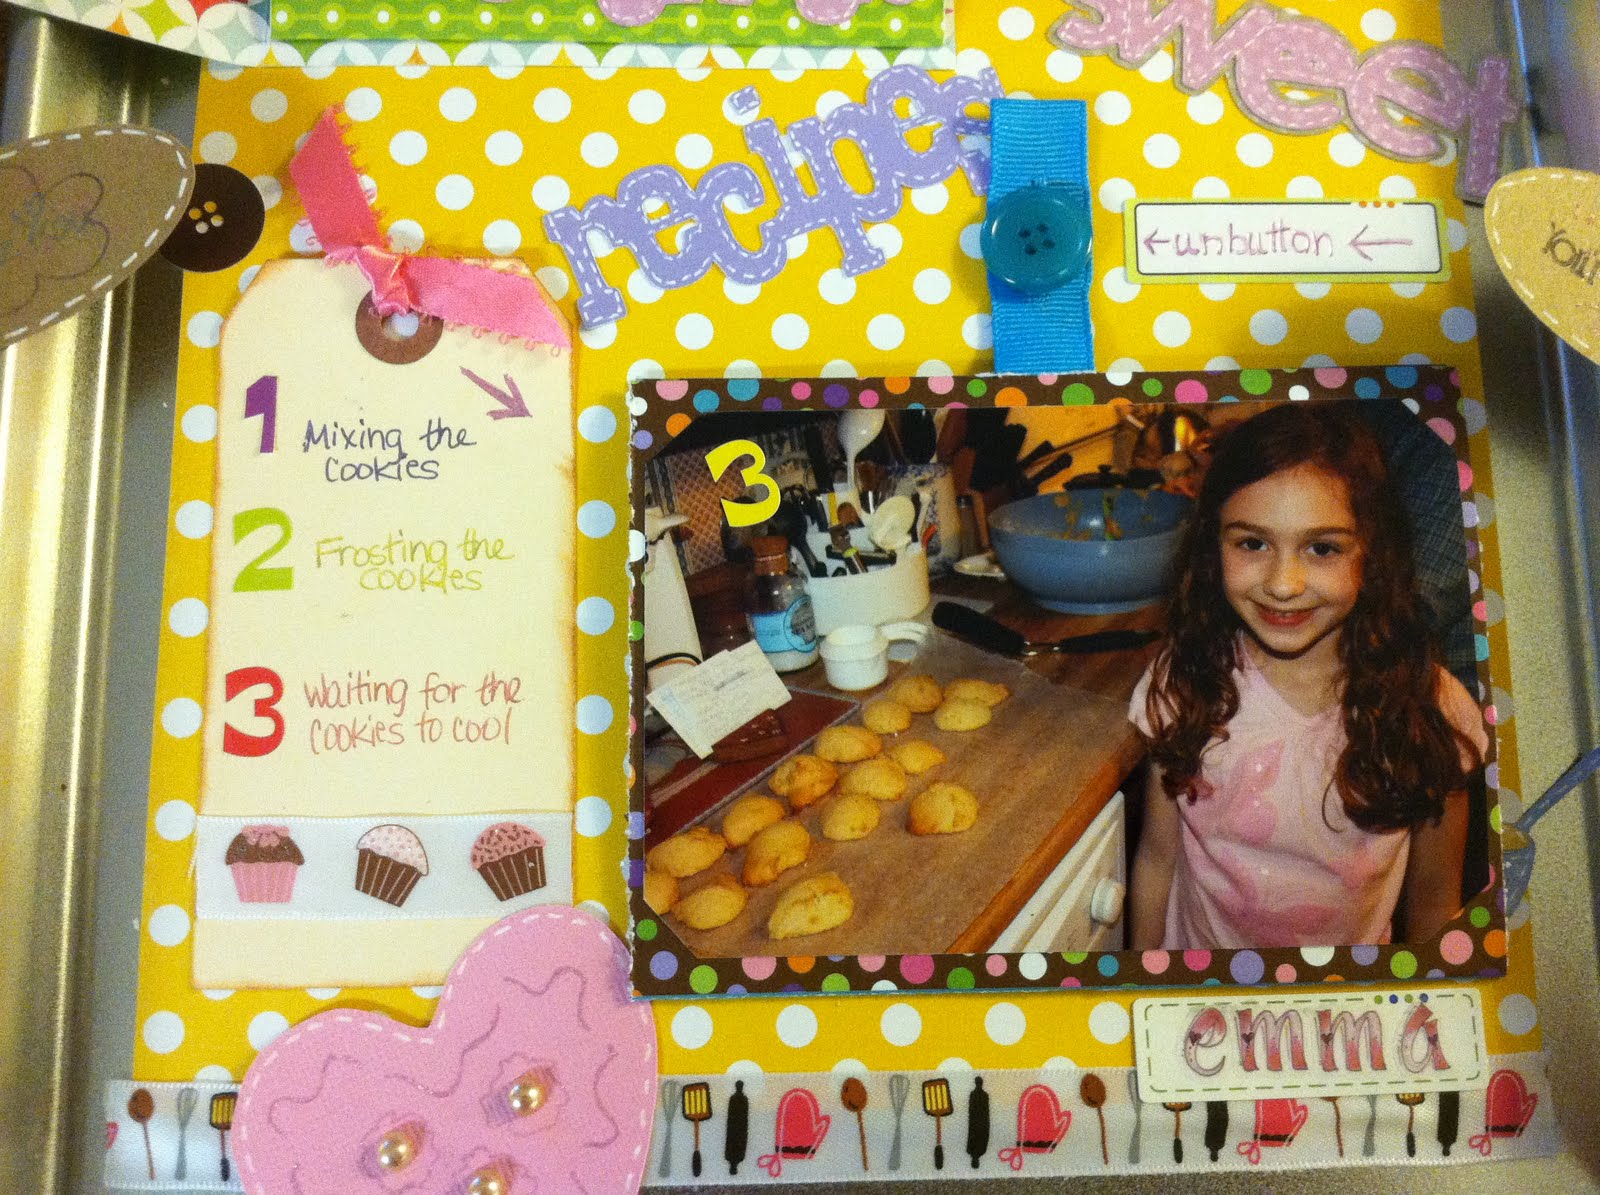
I used the tag in the June kit to journal the 3 pics in this fold-out. I used the sticker numbers to number the pics and the tag.
Close-up of the cupcake. This cut was from Everyday Paperdolls.

Title made with the sticker letters in the June Kit.

Rest of the title: Chum is how my mother-in-law is affectionately referred to as by all the little grandkids! :-)

Here is how it looks all opened up.  When I get home, I plan on adding stickles and other embellishments to spruce it up a bit! 
Hope you enjoyed looking at this project today! Stop back soon!


Comments

This is a wonderful project and what a wonderful keepsake too. I just love it and the colors you used. I am amazed at all the photos you were able to feature... awesome! Thanks for sharing with us today at She's A Sassy Lady.
Anonymous said…
Jennie you did again!! This is one cute project...that "Chum" and Emma will cherish!!!
Missy said…
This is really great, I've never seen one of these before! All of your detail is stunning!!!
Connie J Miller said…
love this my daughter needs one she bakes with her 2 year old all the time
June Houck said…
This is so creative! Thank you for sharing all your details. Love this idea :)
Jeri said…
I was looking at some of the other entries for the My Pink Stamper challenge and came across your awesome, fantastic project. This is really cute. I hope you won't mind if I keep it in my for a future project for myself. I must give you kudos for creating on the road. I know exactly what you're dealing with my husband and I are living full time in our RV so I have very limited supplies with me. I find it to be a challenge in itself. Again, super cool project!!!
Lisa said…
Oh my goodiness! (Yes I spelled it right.) What a project! Such a great idea and I can't believe how much stuff you were able to fit on there! It looks AMAZING! I can't wait to try this myself! Take care!

Popular posts from this blog

Be My Valentine Blog Hop

Hello everyone and welcome to the "Be My Valentine" blog hop!! This is the first blog hop that I have had the opportunity to participate in and I've had so much fun!   If you arrived here from  Macy Bella Designs  then you're on the right track. If not or if you have missed a few blogs along the way, be sure to go to the beginning at  Creations With Kathryn  so you can see all of the great Valentine projects today!! There are even some blogs that have blog candy - (like ME!)  After you check out my project, your next stop will be  Crafty Baskets  . Now, on to my project!! I made a box to put a set of Valentine's cards in. I used a 12x12 piece of double-sided cardstock from K and Co. The cards are made with Kraft paper and are a 4x4 size. I used the Cricut Sentimentals cartridge for the postage stamp cut on the front of each card and used my Gypsy to cut them so I could unlink the H and W so it would be 3.75" square. The valentine cuts for the front of the ca

Think Spring Blog Hop

                                Welcome to the THINK SPRING BLOG HOP!!  You should have arrived here from the amazingly talented  Crafty Baskets  !  If you just happened upon my blog, be sure to go back to the beginning at  Creations With Kathryn  . She is our wonderful host for this hop!  On to my project: I decided to make a Spring mini album to showcase a few pictures that I took at the Zilker Botanical Gardens in Austin, TX.  What is more telling of Spring than flowers?!   I used the Card/Tag feature on the Paisley Cricut cartridge and used paper from the DCWV Spring cardstack. (I think this stack was from last year or maybe even the year before! :-) I'm just finally using it! )  The paper flowers throughout are from the 3 Birds Pretty Petals collection.  Read to the end of this post to find the link for the next blog to hop to and for my blog candy! This is a pic of an open page. Now for my blog candy!!  Just leave me a comment on this post with a way to contact you -

My Pink Stamper Challenge

My Pink Stamper has posted a challenge today to any and all who would like a shot at being on her design team! My project needed to use a favorite Cricut cartridge and the colors: pink, green and brown and another color of my choice. I used my Creative Memories Cheerful Seasons cartridge and my Imagine with the Mr. Frosty pattern cartridge and Snapshot Everyday cartridges. I am going to frame this project so I can always look at my sweet little, brand-new grandson!! The mat behind this adorable picture was printed and cut on my Imagine from the standard shapes on the Imagine and the Mr. Frosty cartridge. I really like this snowflake pattern! This is a close-up of the tree and layers from page 60 of my Creative Memories Cheerful Seasons Cricut cartridge and was cut at 3.5"H. I used Star Dust Stickles to make the "snow" on the tree look like it was glistening! Notice the "wood" paper for the tree trunk - this is a texture pattern on the Snapshot Everyday Imagine